RESEARCH &
DEVELOPMENT
CHALLANGE
To develop a highly accurate or photorealistic proof of concept for a technical aspect of an animation. You must solve the technical challenge to create an accurate animation component.
year
2025
role
Animator Designer
category
Coca Cola
Fluid Sim
software
Houdini
Nuke
CInema 4D
After effect
OBJECTIVE
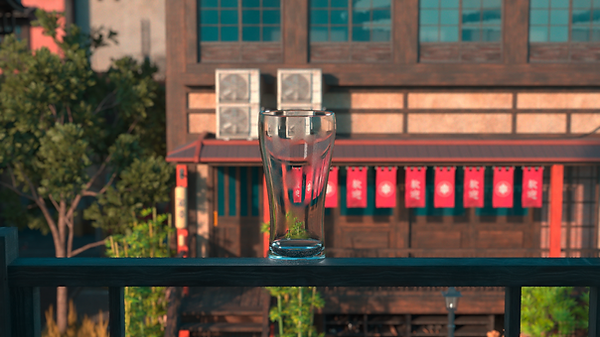
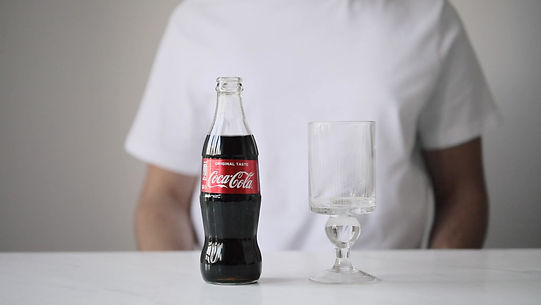
The objective of this project is to create a photorealistic 3D animation of Coca-Cola being poured into a glass, inspired by Coca-Cola’s global slogan “Refresh the World. Make a Difference.” While the full advertisement envisions Coca-Cola being enjoyed in cities around the world.
credit
kitbash 3d
To achieve a convincing and photorealistic result, I focused my research on how Coca-Cola behaves when poured into a glass. Capturing realism required close observation of several key details:
-
Pouring Motion – The speed and angle of the liquid as it flows from the bottle into the glass.
-
Bubble Formation – The carbonation bubbles rising through the liquid, clustering along the glass walls, and dispersing at different rates.
-
Foam Behavior – The thick foam layer that forms instantly on top, then gradually settles and dissipates.
-
Light Interaction – The way Coca-Cola’s dark, translucent liquid refracts and reflects light, creating highlights and depth.
To study these aspects, I collected and analyzed reference videos of real Coca-Cola being poured into glasses. These references provided essential guidance for replicating the physical dynamics of the liquid, bubbles, and foam in 3D.
RSEARCH


PROCESS
I chose Houdini as the primary tool, since it is highly suited for creating complex and realistic fluid simulations. Using Houdini’s fluid simulation tools, I focused on replicating the natural motion of Coca-Cola being poured into a glass.
COLLIDER SETUP
-
Imported a glass FBX model.
-
Adjusted scale and orientation with a transform node.
-
Split into two outputs:
-
Surface Output → used for rendering and visual contact.
-
Volume Output → used as a collider for accurate fluid interaction.
-


SOURCE SETUP
-
Started with a sphere geometry to act as the pouring source.
-
Applied transforms and noise to shape and randomize the emission area.
-
Used FLIP Source to convert geometry into particles for fluid simulation.
-
Added point velocity and attribute noise to control flow speed, angle, and natural variation.
-
Finalized the setup as FLIP_SOURCE_OUT for the main simulation input.

SIMULATION
-
FLIP Fluid Solver was used to simulate the main Coca-Cola liquid pouring into the glass.
-
Added static objects (glass collider) and gravity to keep the interaction realistic.
-
Integrated volume sources and POP VOP adjustments to refine particle behavior.
-
Foam & Bubbles:
-
Created with POP groups and wrangles to isolate particles representing foam.
-
Applied drag, speed limits, and noise to simulate realistic bubble and foam motion.
-
Finalized the output as FLUID_PARTICLES_OUT, which provided the base for rendering and shading.


SIM PLAYBLAST

-
Surface Layer: Main body of the Coca-Cola liquid, simulated with FLIP fluids.
-
Foam Layer: Additional particles generated at the liquid–air boundary to recreate the thick froth forming at the top of the glass.
-
Bubble Layer: Rising carbonation particles inside the liquid, giving the drink its signature effervescence.
-
By separating these layers, I could adjust each element individually (motion, shading, rendering), which allowed for greater realism and control in the final animation.
FOAM, SURFACE, and BUBBLES

-
Background: Set up a simple environment to ground the glass and Coca-Cola without distracting from the main action.
-
Assets: Imported and managed 3D elements (glass, liquid, foam layers) as separate passes for flexibility.
-
Lighting: Controlled key lights, reflections, and highlights to emphasize the bubbles and transparency of the liquid.
-
Camera: Configured close-up angles and depth of field to direct the viewer’s focus on the pouring motion.
-
By separating these elements into nodes, I was able to fine-tune each component individually and achieve a balanced, photorealistic render.
RENDERING

In Nuke, I carried out a full compositing workflow for multiple shots. Depending on the needs of each shot, I used CryptoMatte to isolate specific elements, applied denoising to clean up the footage, and performed color grading to unify the overall look. Some shots involved multi-layer compositing with merges and keying, while others required only simple adjustments. Each shot was organized in separate backdrops and exported through Write nodes to maintain a consistent pipeline and ensure visual continuity across the sequence.”
POST-PROCESSING

BREAKDOWN